+Bookings

Ace Hotel System
+Bookings
Creating a new reservation is simple, lets go through the process and we will show you some advanced features as well.
Create a simple/individual reservation
There are a few ways to create a simple reservation.
-
Through the +Booking button
-
By clicking right or left clicking on a date on the calendar
-
By adding a room on to an exciting reservation
Create booking Through the +Booking button
Navigate to the +Booking button and select Simple booking and a pop up will appear.
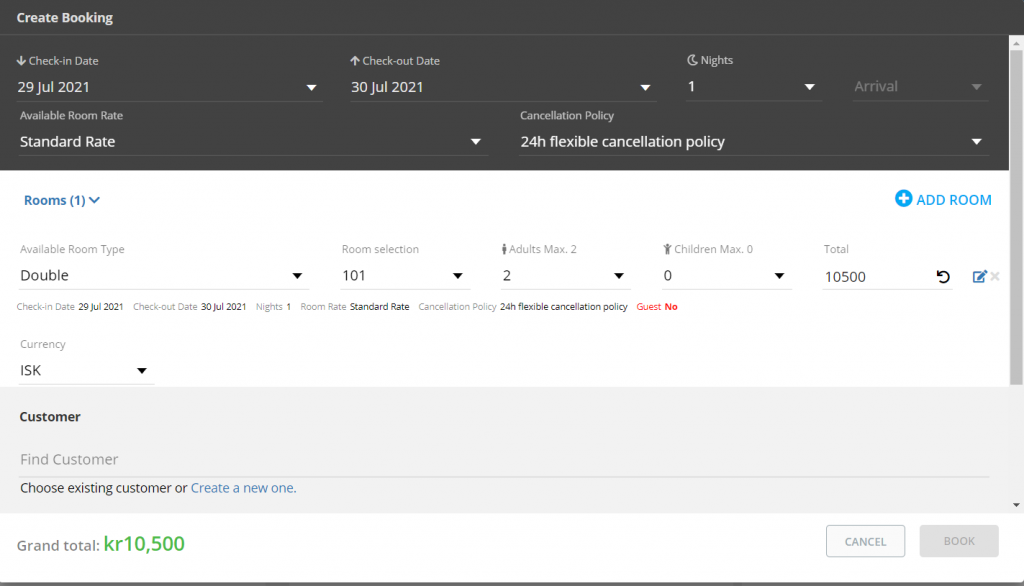
Check-in Date – Select or change the check in date
Check-out Date – Select or change the check out date
Nights – Select or change the number of nights (this will change the check-out date automatically)
Available Room Rate – Select a different rate type
Available Room type – here you can choose the room type
Room Selection – Select which room the booking will be assigned to
Adults – Amount of adults
Children – Amount of children
Don’t Move Checkbox – This puts a lock on the booking to not allow room changes.
Optional Field Arrival: You can select the arrival time of the guest
Next step is to check the prices.
You can change both the price per night or the total figure. The reset button will put back the default prices.

In order to save a reservation you will need to create a new customer OR select an exciting customer. Book button will turn green when you have created a customer (last name mandatory)

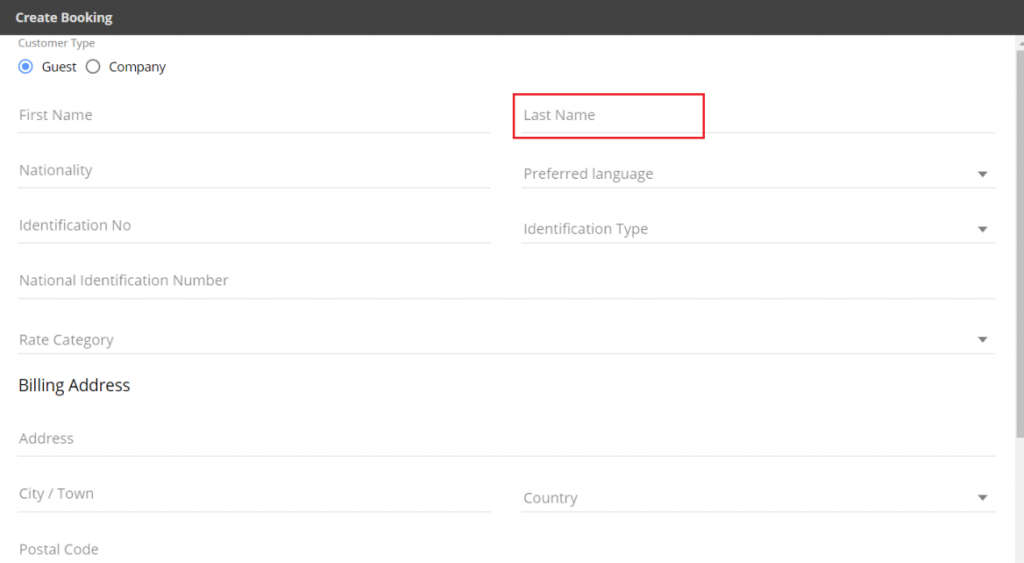
This page is to ask for the customer details.
First Name: Guest first name
Last Name (Required): We always need the last name of the guest in order to save the reservation
Email: Email address for guest
Phone Number: Guests phone number
Guest Request: Enter the guests requests if any
Create booking By clicking right or left clicking on a date on the calendar
Navigate to the calendar screen by clicking on “Bookings” tab
Now you need to scroll the calendar to the correct screen or use the date picker on the left hand side
Then you just click on the calendar and if it multiple nights you can click and drag also.
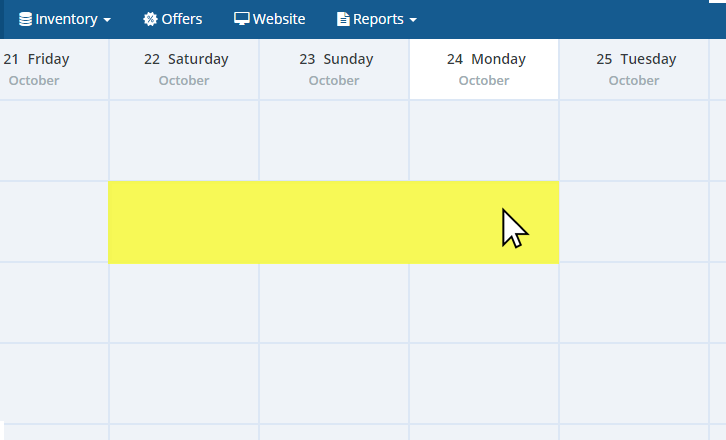
After clicking on the calendar you will be presented with a popup the same steps as shown above.
Search for past guest data
When you type we will automatically search for previous guests that are a match, you can select these records to speed up booking. We show the full name, email address and telephone number in case there are multiple people with similar names.
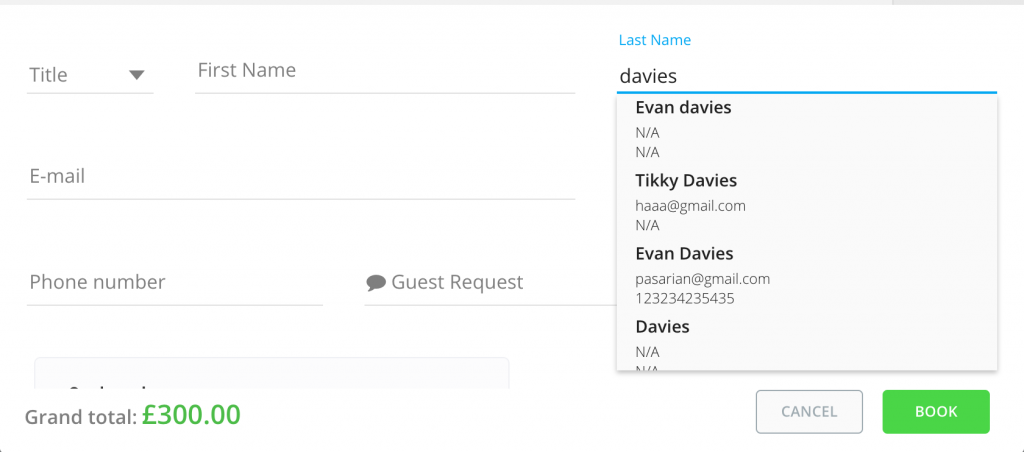
Searchable Fields: First Name, Last Name, Email Address & Phone Number
FYI : credit card details are not a mandatory field when you create a reservation (just on OTA channels) and booking engine)
Create group reservation
We added a group booking feature to make is easier and quicker to add group reservations.
Make sure you have it enabled in your Settings.
Navigate to +Bookings and select Group Booking from the drop down list.

A pop up will appear where you select the dates and rate plan for your reservation.

Next step is selecting what type of room types and how many persons in each room you want by typing in rooms count field and selecting +add to basket.
You will see how many rooms you have in your basket and total amount of persons.
FYI: Rate plan and adjust cancellation plan if needed.
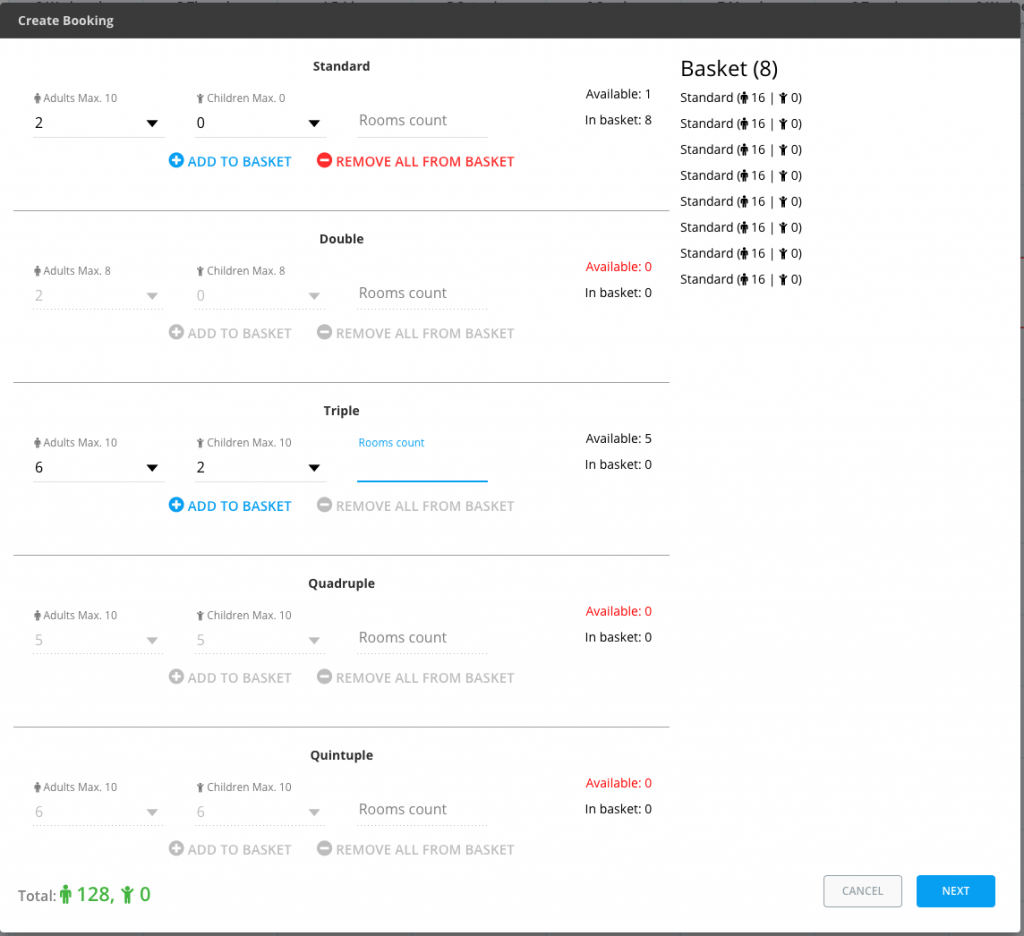
You will get to the next step of confirming the Customer name (you can use the agency name here) and the guest names will be set as dummy name until you get your naming list that you can use for editing.
In this example I will use my Example agency as a customer:
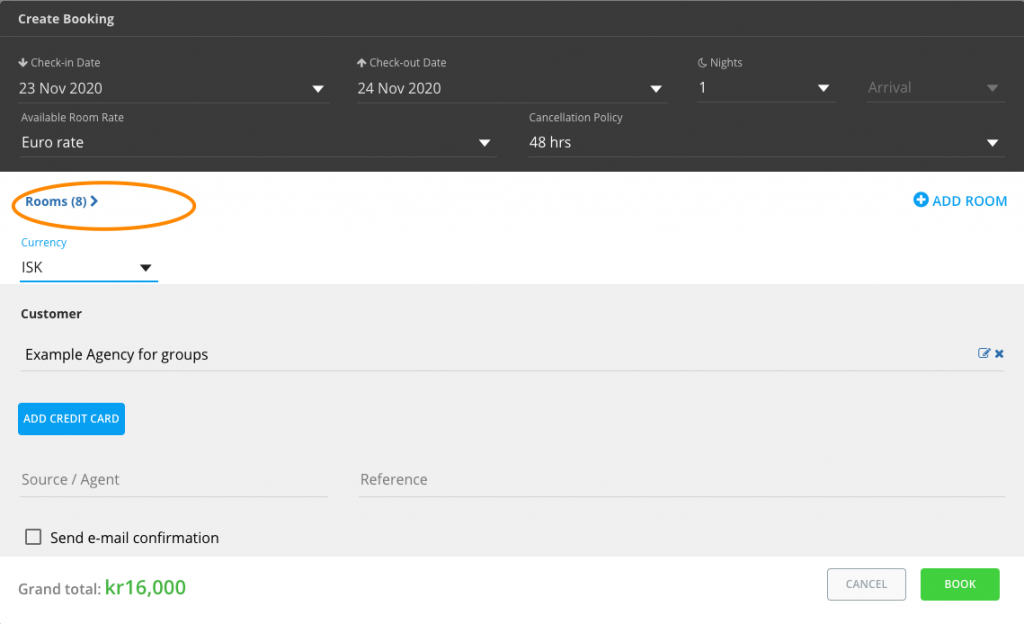
And finish the booking by clicking on Book.
To see the information about each room you are able to click on Rooms (orange circle) and the room list will drop down. Go back by clicking Rooms again.

By clicking on the edit sign in the right side of the window, I will get the option to add more guest information:
